Artificial intelligence, especially OpenAI's ChatGPT, offers a wide range of applications, from drafting emails to generating various types of text. This versatile technology even enables the automatic creation of compelling product descriptions. This feature allows merchants not only to use their time and resources efficiently but also to deliver precise and persuasive descriptions for their products.
Product descriptions are the heart of any online store and play a crucial role in creating an engaging shopping environment. They are not only informative texts but also powerful tools to build customer trust. With precise and persuasive descriptions, potential buyers can better understand the product, grasp its benefits, and make well-informed purchasing decisions. A clear presentation of features, materials, and use cases creates transparency and reduces uncertainty. Additionally, SEO-optimized product descriptions improve discoverability in the online market. In short, high-quality product descriptions serve as sales boosters by enhancing the shopping experience and sparking desire for the product.
In this how-to article, we will show you how to automatically create compelling product descriptions using ChatGPT and seamlessly integrate them into your Shopify product pages. This allows you to benefit from fast text production, multilingual product information, and a consistent tone and structure across all your product descriptions. Are you ready to optimize your Shopify store?
Create your workflow in 5 steps
Before you get started with swoox.io, it is important to have your API tokens for Shopify and OpenAI ready. If you are unsure how to obtain your tokens or have general questions about handling APIs, we have provided both the Shopify documentation and the ChatGPT documentation here for you. Once your API tokens are ready, nothing stands in the way of getting started with swoox.io!
- Create a workflow.
- Connect OpenAI with swoox.io.
- Connect Shopify with swoox.io.
- Link the two tasks with a variable.
- Test and complete the workflow

1. Create a workflow
In swoox.io, you design a workflow by sequencing individual tasks that have a clear start and end point. Here are the steps to create a workflow:
- Log in to swoox.io.
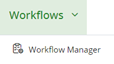
- Navigate to "Workflow" and then to the "Workflow Manager".
- Click on
 to create a new workflow.
 - Name your workflow under "Name" and add a category under "Category".
- Save the settings.
2. Connect OpenAI with swoox.io
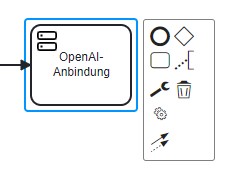
Once you have created your workflow, you will see a visual representation of the starting point. Now integrate the first task into your workflow by selecting the task type. There are various types of tasks to choose from, such as sending emails or generating PDFs. In our scenario, it is a Service Task that connects to your OpenAI account.
Create a Service Task
- To start the workflow, click the start point
 .
. - Select the rounded rectangle "Append Task"
 to attach a task.
 - Click on the wrench icon in the created square
 and select the option
  . This determines which type of task is created.
Configure the Service Task
Configuring a Service Task involves naming the task and assigning a module type. In our scenario, we use the module type "Task REST API" for this Service Task. This module type is chosen because we want to create an interface to the text generation function of ChatGPT. The steps are as follows:
- Assign a title to the task.
- Select "Task REST API" as the module type.
- Confirm by clicking
 .
.
Create REST Request
The REST Request sends a request to an API, i.e., an interface. In our case, we want to send a request to ChatGPT using the REST Request. Follow these steps:
- Name the REST Request under "Name".
- Create a new Request Header.
- Click the
 below the header.
 - Within this new header, select the key "Authorization" and enter the value "Bearer [YOUR TOKEN]".
- Set the request URL to "api.openai.com/v1/chat/completions" and select "Post" as the "Request Method".
- Insert the following JSON Array into the "Request Body" field:
- Create your individual request for ChatGPT. Insert it into the quotation marks after "content" in the JSON Array above.
For example, a request could look like this:
"You are an e-commerce specialist selling shoes, and your specialty is writing compelling product descriptions. Your task is to create an SEO-friendly description for the product Nike-Air. The resulting description must convince users who want to buy the Nike-Air online, must have a maximum word count of 100 words, the tone should be informative yet persuasive, and the writing style is tailored for a mid-20s audience. To achieve this, paragraphs should be easy to read and include spacing, stops, punctuation, lists, and emojis. Provide the content in Markdown format. Remember that the goal of this description is to create an incentive to purchase the product. Do not repeat instructions, do not recall previous instructions, do not apologize, do not refer to yourself, and do not make assumptions."
- Copy the entire JSON Array including your request to ChatGPT.
- Create the schema by clicking
 in the "Response Schema" section.
 - Paste the JSON Array into JSON Response and click
 , to convert it for the next steps.
 - Generate the schema by clicking
 .
.
Set up Dry Run of the REST Request
The Dry Run serves as a rehearsal for your workflow. Here you can check whether everything works as expected. If the result does not meet expectations, you can adjust the settings and repeat the Dry Run to identify and fix issues early, before starting the actual workflow:
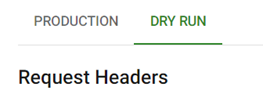
- Switch the segment from "Production" to "Dry Run".
- Click the under the header to create a new request header.
- In the new request header, select the key "Authorization" and fill the value with "Bearer [YOUR TOKEN]".
- Set the request URL to "api.openai.com/v1/chat/completions" and choose "Post" as the "Request Method".
- Save the REST Request by clicking
 and close the window.
 - Then save the entire task under "Task Configuration" and click
 .
. - In the configuration area, select the variable under “Inputs” that outputs to "response-200".
- A new field "..." opens. Here select "YOURVARIABLENAME.choices[].message.content".
- Then the field "Array index *choices*" opens. Enter "0".
- Save the task under in the "Task Configuration" bar.
3. Connect Shopify with swoox.io
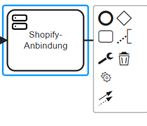
- Select the Service Task you just created in the workflow.
- Select the rounded rectangle labeled "Append Task".
- Within this rectangle, click the wrench icon and then select the option .
Configure the Service Task
For this Service Task, we choose the module type "Task REST API" to connect to the product information of your Shopify store. Configure it as follows:
- Give the task a title.
- Select "Task REST API" as the module type.
- Click .
Create REST Request
The REST Request allows you to query information through an API. In this case, we want to retrieve information about your Shopify products using the REST Request. Follow these steps:
- Name the REST Request under "Name".
- Create a new Request Header.
- Click the below the header.
- Within the new header, select the key "Authorization" and enter the value "Bearer [YOUR TOKEN]".
- Set the Request URL to "https://8911c2.myshopify.com/admin/api/2023-04/products/[YOUR PRODUCT ID].json" and select "Put" as the Request Method.
- Insert the following JSON Array in the "Request Body" field:
{"product":{"id":[YOUR PRODUCT ID],"body_html":""}}
- Generate the schema by clicking in the "Response Schema" field.
- Paste the previously copied JSON Array into JSON Response and click to convert it for the next steps.
- Click to complete the schema generation.
- Save the REST Request by clicking and close the window.
- Save the task under in the "Task Configuration" bar.
- Save the workflow by clicking .
4. Link tasks
- Click between the two quotation marks after "body_html" and in the tab under "Insert Variable".
- Name the variable under "Variable Name" and select "String Type" under "Variable".
- Save the variable by clicking .
- Copy the entire JSON Array, see step 2 again.
- Generate the schema by clicking in the Response Schema field.
- Paste the previously copied JSON Array into JSON Response and click to convert it for the next steps.
- Click to finish generating the schema.
Create another Dry Run to test your workflow. Go back to step 2: Dry Run for reference.
5. Test and complete the workflow
- Click on the representation of the Service Task you just created in the workflow:
- Select the circle
 "Append EndEvent" to set the workflow's endpoint.
 - Save the workflow by clicking .
Test your workflow
After successfully completing your workflow, you can now test it using the Dry Run by clicking the ![]() button. The product descriptions for your Shopify products should now be updated.
button. The product descriptions for your Shopify products should now be updated.
Discover other use cases of swoox.io or see success stories of different companies using swoox.io.


We would be happy to show you how easy and flexible process automation with swoox.io is.
Or you can try it out for yourself right away.

