Efficient management of order information and its quick updating are crucial for Shopify businesses. Many store owners use Google Sheets to display order data in a clear and organized manner. The advantage: all important information is easily accessible to all employees and can be easily shared and edited among team members. Unfortunately, this information is often manually entered into the sheets, which takes a lot of time and effort. The problem: the order information is usually already outdated by the time it has been manually added.
In this how-to article, we will present a solution on how to automate workflows using our automation tool swoox.io. We will show you step by step how to automatically import your Shopify orders into Google Sheets with swoox.io and automatically update these sheets. This way, YOU can always work with current order data and save time and effort.
What You Should Know
Before you start with swoox.io, you should have your API tokens ready for both Shopify and Google Sheets. If you don't know how to get your tokens or have general questions about using the APIs, we have provided the Shopify guide and the Shopify guide and the Google Sheets guide ready. Once you have your API tokens, you can start right away!
5 Steps to Your Workflow
- Start a workflow in the swoox.io Workflow Manager.
- Add the first task to your workflow: connecting your Shopify account to swoox.io.
- Add the second task to your workflow: connecting your Google Sheet to swoox.io.
- Link both tasks by adding a variable.
- Complete your workflow and get a Google Sheet with all important and up-to-date information about your Shopify orders.

1. Start a Workflow
A workflow is a sequence of individual tasks with a start and end point. In swoox.io, you create a workflow as follows:
- Open the swoox.io application and log in.
- In the tab under "Workflow", select the "Workflow Manager".
- Click on
 in the Workflow Manager to create a new workflow.
 - Give the workflow a name under "Name", select a category under "Category", and save the settings.
2. Add the First Task: Connecting Your Shopify Account to swoox.io
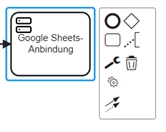
After creating the workflow, you will see the graphical representation of the start point. Next, add the first task to the workflow by selecting the task type. Various task types are available, such as sending emails or creating PDF files. In this case, it is a Service Task to connect to your Shopify account.
Create a Service Task
- Click the start point
 to start the workflow.
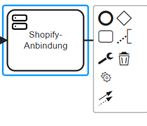
 - Select the rounded rectangle "Append Task"
 to add a task to the workflow and set up the first step.
 - In the created rectangle, select the wrench icon
 and then select
  .
.
Configure the Service Task
Configuring a task involves giving it a title and assigning a module type. In this example, the module type for this Service Task is "Task REST API" because we want to create the interface to your Shopify orders. Follow these steps:
- Give the task a title.
- Select the Module Type "Task REST API".
- Click
 .
.
Create the Rest Request
A Rest Request is used to retrieve data from an API. In our example, we want to query information about your Shopify orders via the Rest Request. Proceed as follows:
- Give the Rest Request a name under "Name".
- Create a new request header.
- Click the
 under the header below.
 - Within the new request header, select the key "Authorization" and fill the value with "Bearer [YOUR TOKEN]".
- Fill in the Request URL with "https://shopify.dev/docs/api/admin-rest04/orders.json?status=any" and choose "Get" in the Request Method field.
- Generate the schema by clicking
 in the Response Schema field.
 - Insert the following JSON array into JSON Response and click
 to convert it for the next steps.
 - Click
 to complete the schema generation.
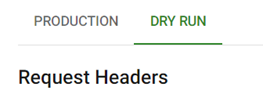
Set up a Dry Run of the Rest Request
The Dry Run simulates the actual execution of the workflow. This allows you to test whether the workflow works as expected. If you are not satisfied with the Dry Run results, you can make changes to the workflow settings and test again using the Dry Run until it meets your requirements. This helps identify and fix inconsistencies early, before running the actual workflow. To set up the Dry Run:
- Switch from the "Production" segment to "Dry Run".
- Click the under the header to create a new request header.
- Within the new request header, select the key "Authorization" and fill the value with "Bearer [YOUR TOKEN]".
- Fill in the Request URL with "https://shopify.dev/docs/api/admin-rest04/orders.json?status=any" and select "Get" in the Request Method field.
- Save the Rest Request by clicking
 and close the window.
 - Save the entire task under "Task Configuration", then click
 , save again under "Task In/Out Configuration" and close the window.
Note: The variable in the response-200 field contains Shopify’s response with all orders and can be used as input in subsequent tasks. In our case, we use this to update our product descriptions.
3. Add the Second Task: Connecting Your Google Sheet to swoox.io
- Click the representation of the service task you just created in the workflow:
- Select the rounded rectangle "Append Task" .
- In the created rectangle, click the wrench icon and then select .
Configure the Service Task
In this example, the module type for this service task is "Task REST API", as we want to create an interface to your Google Sheet. Follow these steps:
- Give the task a title.
- Select the Module Type "Task REST API".
- Click .
Create the Rest Request
The Rest Request is used to retrieve information from an API. In this example, we want to request information to update your Shopify orders. Follow these steps:
- Give the Rest Request a name under "Name".
- Create a new request header.
- Click the under the header below.
- Within the new request header, select the key "Authorization" and fill the value with "Bearer [YOUR TOKEN]".
- Fill the Request URL with "https://sheets.googleapis.com/v4/spreadsheets/[YOUR SHEETID]/values/Sheet1!A2:G100?valueInputOption=RAW" and choose "Put" in the Request Method field.
- Insert the following JSON array in the "Request Body" field:
-
- Generate the schema by clicking in the Response Schema field.
- Insert the following JSON array into JSON Response and click to convert it for the next steps:
- Generate the schema by clicking
{ "type": "object", "properties": {
"spreadsheetId": { "type": "string" },
"updatedRange": { "type": "string" },
"updatedRows": { "type": "int" },
"updatedColumns": { "type": "int" },
"updatedCells": { "type": "int" } } }
- Click to complete the schema generation.
- Save the Rest Request by clicking and close the window.
- Save the task under "Task Configuration" by clicking .
- Save the workflow by clicking .
4. Connect Both Tasks by Adding a Variable
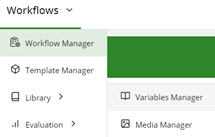
- Now switch in the tab under "Workflows" from "Workflow Manager" to "Library" and then to "Variables Manager":
- Then click

- Give the variable a name under "Name" and a short code under "Short Name"
- Select a category under "Category" and choose "Task Input Value" under "Variable Type"
- The "Input Value Schema" field will now open
- Insert the following JSON array from this txt file:
JSON Array - txt file
- Save the variable by clicking
- Go back to the "Workflows" tab under "Workflow Manager":
- Select your workflow by clicking

Insert a Loop
Adding a loop allows the table and order information to be updated repeatedly. To add a loop:
- Select the last service task in the workflow view:
- Edit the Rest Request by clicking
 in the "Task Configuration" sidebar
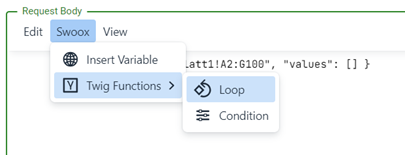
 - Click in the "Request Body" field inside the inserted JSON array between the square brackets after "values"
- Add a loop by selecting "Swoox" → "Twig Functions" → "Loop":
- Then click in the "Loop Element" field on
- Select your previously created variable in the "Variable" field
- In "Select property for 'Variable'", choose "XYZ.orders"
- Save by clicking
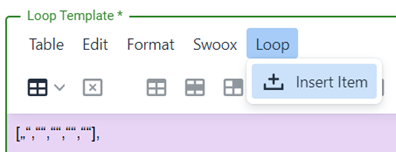
- Insert the following in the "Loop Template" field:
- Click between the first two quotation marks
- Then, in the "Loop" tab, select "Insert Item":
- In "Loop Value", select the information from the Shopify order to write into the loop
- Save the loop by clicking
- Also insert items between the remaining quotation marks as needed. If you need more information from your orders, simply add more quotation marks. If you need fewer than given, remove the unnecessary quotation marks.
- Save the Twig Loop by clicking
Set up a Dry Run of the Rest Request
The dry run simulates the actual execution of the workflow. You can use it to test whether your workflow works as intended. If you are not satisfied with the dry run result, you can make adjustments to your workflow settings and test again until it meets your requirements. This allows you to identify and fix any issues early before running the actual workflow. To set up the dry run:
- Switch from "Production" to "Dry Run":
- Click the at the header below to create a new request header
- In the new request header, select the key "Authorization" and fill the value with "Bearer [YOUR TOKEN]"
- Fill the Request URL with "https://sheets.googleapis.com/v4/spreadsheets/[YOURSHEET ID]/values/Sheet1!A2:G100?valueInputOption=RAW" and choose "Put" in the "Request Method" field
- Save the Rest Request by clicking and close the window
- Now save the entire task under "Task Configuration", then click , save again under "Task In/Out Configuration" and close the window
5. Complete Your Workflow
The endpoint completes the workflow. To set the endpoint of your workflow:
- Click on the service task you just created in the workflow:
- Select the circle
 "Append EndEvent" to set the workflow endpoint
 - Save the workflow by clicking
Test Your Workflow
After completing your workflow, you can test it using the dry run by clicking ![]() . Your Google Sheet should update with your Shopify order information.
. Your Google Sheet should update with your Shopify order information.
Discover more use cases of swoox.io or see the success stories of various companies using swoox.io.


We would be happy to show you how easy and flexible process automation with swoox.io is.
Or you can try it out for yourself right away.

